Back to Page 1 of the Offshore Lure Tying Guide
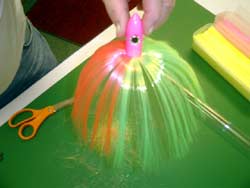
Step 5
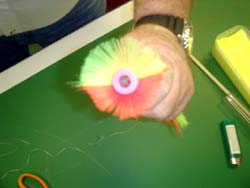
With the floss loosely wrapped, use your thumbs to spread the hair across the lure head. Arrange the hair evenly so that each color is on one side. Wrap the floss tightly around the head 8 or 10 times to secure the hair. Check the hair as you go to make sure that it is evenly spread all the way around the head.
Step 6
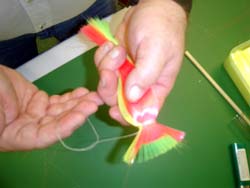
Keep wrapping the floss tightly until you reach the wrapped circle on the other end. Place the loop over the head and pull tight. Tie another half of a square knot and pull tight. Once you have the floss secured well, cut the end off the floss about 1/4 of an inch from the final knot.
Step 7
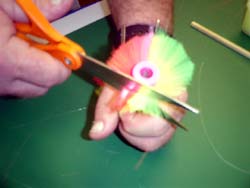
Cut the excess hair as closely as possible to the lure head. Take your time to make sure that you don't pull on the hair with the scissors and that all the excess is removed.
Step 8
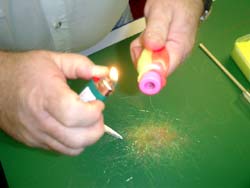
Carefully use the lighter to melt the floss. Keep the lighter moving to avoid melting through the floss or hair and don't worry if you blacken some of the head, the soot can be removed when you are done. Once the floss is melted, it forms a solid ring that will keep the hair in place.
Step 9
The hair is now secure and the lure is ready.
Step 10

Carefully place the head of the lure into the tube and use the stick to push it in without damaging the hair. Push it in until about an inch of hair is left hanging out of the tube.
Step 11

Cut the hair that is sticking out of the tube to an even length. Tap the tube to fully seat the lure and then cap the other end.
The Final Product
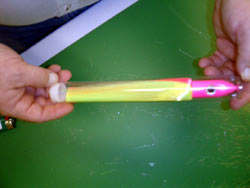
Your lure is now ready for the blue water, just keep it stored in the tube between outings and it will last for a long time. Should you have an agressive fish remove some of the hair, the floss can be cut and new hair can easily be tied on again.
 Piers |
 Charters |
 Weather |
 Reports |
 Knots |
 Maps & Charts |


|

Coastal Fishing Piers NC Marine Forecast How to Tie Fishing Knots Licenses & Regulations
Saltwater Fishing Reports North Carolina Fishing Charters Site Map Contact Us
Copyright © 2005-2016 Fishing-NC.com. All Rights Reserved. Privacy Policy